I am absolutely obsessed with planners at the moment. Having a planner is not a new thing in my life; I used to use spiral-bound Paperchase planner all through college. Borders used to sell them and every year I’d buy a new one. It really never hit me to buy myself a leather-ringed binder planner before until I discovered the beauty of a Kikki K last year. Now I’m obsessed. Granted, I’m obsessed with any and all paper stationery, but lately whenever I see a new pretty planner binder, I want it, even though I don’t need it. I only have one schedule, which is the essential part of my planner, but I love the fact that I can added and switch around all this things, from my divider sections and the little cards of inspiration I keep in my planner as well. My planner is more than just a planner. It’s like a little daily scrapbook of things. I like decorating my pages and adding cards and lists and other tidbits.
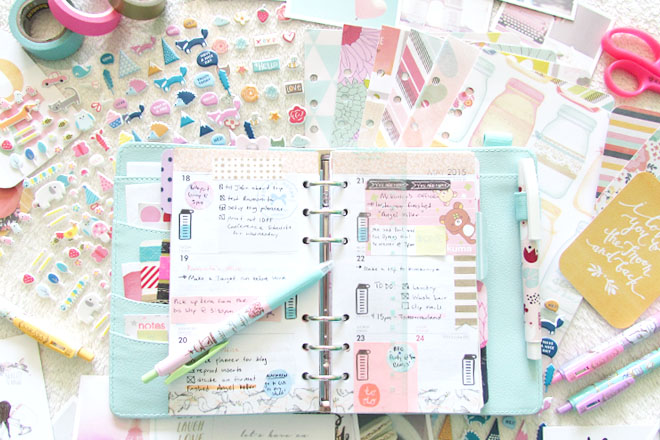
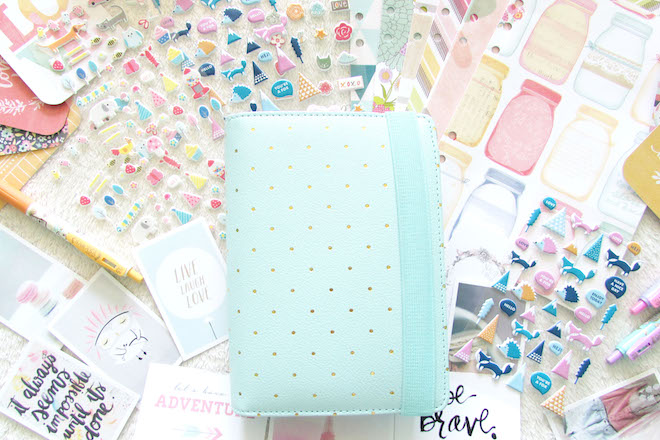
Everyone always asks what do you use your planner for? And why do you need so many? I can justify my obsession in so many different ways, but there really is no definitive answer. I use my planner is so many different ways and I have a few of them that either house different things or to just switch them up whenever I feel like it. Some days I’m feeling my lilac and gold Kikki K and other days I want to be in my mint Dokibook. I personally use my personal-sized planners a lot more than my A5 Kikki K. I’ve got two personal-sized planners, a lilac and gold Kikki K and a mint and gold dots Dokibook, that I switch out every few weeks. My personal planner is where I keep track of everything and anything. Here’s just a little peak at how I keep my planner.
The first thing you see when I open my planner up is the pockets filled with goodies and my dashboards. In the pockets I just keep the essentials: washi tape samples, colored dots, sticky notes and flags and a few paperclips. As for my dashboards, the first thing I have there is a We R Memory Keepers journaling card that reads “Pocket full of sunshine” on the front and “This is what it’s all about” on the back. After that I have a pocket page from Heidi Swapp with more quote cards in them. These little pocket pages are awesome because you can use them to store journalling cards or stickers or use them as dashboards or just a little memory piece by adding photos of your family and friends. I like to use them to have these Heidi Swapp quote cards on hand. It gives me a bit of inspiration for my day, as it’s the first things I see when I open up my planner. Then I have my dashboard, which I made myself from some Dear Lizzy scrapbook paper, along with my dividers that I’ve embellished with some die cuts, a journal card, washi tape and paperclips. All my dividers are decorated differently and I think it gives a very personal unique touch to my planner.
After the first dashboard I have another quote card, but on the back of this one I’ve written out my planner legend. It’s basically the key to my planner. I like to color-code things and use my StudioL2E Icon stamps to mark off reminders. This card just acts as a reference guide. On the opposite, I have my personal information should my planner get lost. Then after that I start off with my monthly calendar.
I use my monthly calendar as a general overview. I jot down important work and social events that are happening in the month. I use thin washi tape to mark events and classes that I participate in that extended over a couple of days. When I’m unsure whether or not a date is fixed, I write the event on a circle dot, so that in the event the date has changed, I just have to peel and stick it on the right day. I use a little bow paperclip to mark the current month.
My next section is my weekly section. I currently use my Kikki K week on two page inserts that came with my lilac and gold. I start off each month with a monthly printable from Design Is Yay. You can sign up to her newsletter and at the ending of each month she’ll email you the printables for the next month. The printable is an overview of each month, where I write my top 3 priorities or goals for the month, as well as all the the important events by date happening in the month. These printables are so cute, I definitely recommend checking out her site!
I decorate my weekly spreads a bit with stickers, washi tape and sticky notes. I always use the water bottle stamp from StudioL2E to keep track of my water intake for each day. I use a blue pen or highlighter to shade in the amount of water I intake. There are eight lines in the bottle, each line corresponding to the eight 8 ounce glasses of water you should be intaking per day. Everyone always asks me about this stamp! StudioL2E Iconic Stamp, $8 USD, go go GO!
Throughout my weekly spreads, I have random little bits of things. I use journaling cards a lot to jot down lists of things I have to do or buy. Lately, I’ve been using them as “No Spend” monthly trackers, which helps me track when I spend unnecessarily. I have quote cards throughout, just to add a little inspiration for the week, etc. The best thing about a ringed planner is that you can add and take out things whenever you feel like it and rearrange sections to make it your own.
The next section is a newly revamped section of my planner: my blog planner. I’ve always had this section in my planner, but I realized lately that I wasn’t utilizing it the way I had intended. So I rethought it and redid it. Now, my planning is monthly. I’ve officially started it off for this June, so that’s why it’s pretty bare, but the gist of it is this: Each month starts off with an overviews sort of. The first page is where I’ll jot down my blog ideas for the month. At the bottom corner is my “Blog Review,” or overview of how the month went. I’ll fill this out at the end of the month and jot down how many post were published, the total comments I got that month, and the total number of blog views.
The next two pages is my month at a glance. This is where I’ll write down when I post. I’m thinking I write down the post title on little circle stickers and place them when I want that certain post published, so in case I don’t finish up that post in time, I can move it to a different date on the calendar without having to cross anything out. So essentially this will be my editorial calendar. Then the following page is where I track my social media pages. At the end of each month, I’ll just fill out how many followers I have for each, that way I can see how much my audience grows. The page next to that is my “Blog Content Planner.” It’s where I plan each individual post. I currently using a free printable from StudioL2E for this. It’s a perfect printable to organize your thoughts on a post you want to write.
The next and last section is my penpal section. It’s where I keep track of my penpal’s addresses, social media handles, birthdays and their interests and likes. I have a small envelope pocket in the front of the section where I store all my stamp sheets, then my penpal address pages with all the information I mentioned before. At the end of my planner I have a final divider, a top loading pocket where I store things like receipts or in this case, airline confirmation tickets. Then I have a sturdy page lifter in the back to keep my pages from bending when I close my planner. And that’s it! That’s how I keep and use my personal planner.


Vanessa
Love your setup and loved the idea of your blog planner :)
Tiffany Julia
VanessaThank you Vanessa!
maria kanoi
Wow! I am in awe of how you decorate and make use of your planners..and I totally love reading your blog..you are an inspiration :)
Now it made me more excited to have my first official planner as a newbie in this community ^^,
Thanjs and more power!
Tiffany Julia
maria kanoiAww thank you! And welcome! This is a super great community with such lovely ladies. I’m glad you found us! Happy planning! :)