I am officially obsessed with my mint planner. Sometimes I don’t even want to use it, just look at it because it’s so pretty. Yes, I am quite aware that I have a serious problem. It’s such a crazy addiction I have, this paper addiction, I sometimes fail to understand it myself. Anyway, I keep thinking of ways to customize it and make it even cuter than it already is. Plus, it doesn’t help that Kikki K is holding a little contest on Instagram. All you have to do is share as many pictures or videos of how you customize your planner and you could win one of five planner goodie bags from Kikki K full of their pretty products! Who doesn’t love getting stuff for free? So, I decided to play around some more and even though I don’t exactly know what I’m going to use some of the divider sections for just yet, this is how I set up my planner.

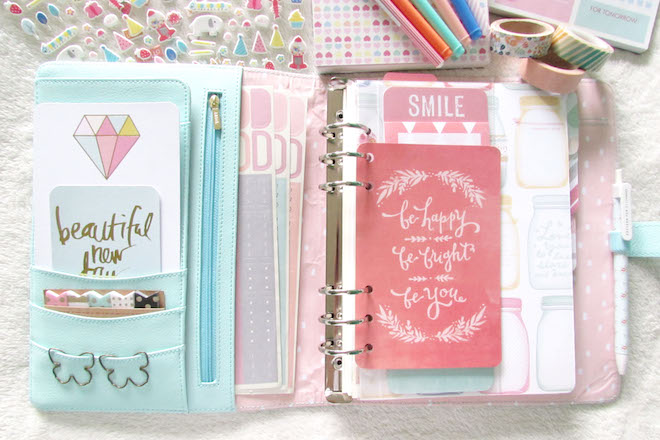
For the bits in the pockets of my planner, I kept it to a minimal. I simply have two Heidi Swapp Project Life cards from her Gold Foil Value Kit, a pack of Target page flags and two butterfly paper clips. In the larger slit pocket I have the three Kikki K sticker sheets that came with the planner inserts.
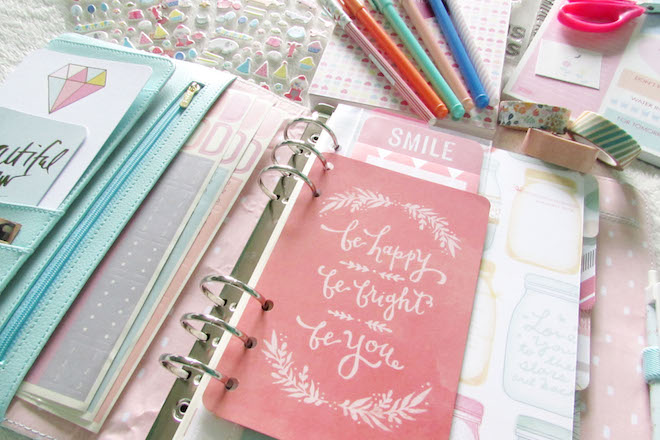
Now, for my front page, the first thing you see is a 4×6 Project Life card that reads, be happy, be bright, be you. It’s from We R Memory Keepers Simply Happy line that I got at Target and I just like the quote on it a lot that I thought it fitting in an inspirational sort of way to be the first thing I see when I open my planner up.
When you flip the card over, the next thing you’ll find is my small little dashboard that I made out of a Project Life page protector. I took a 6×8 page protector sheet that can hold four 3×4 Project Life cards and trimmed it down the middle. Then I punched the correct amount of holes in it, added a few Project Life cards (from the Heidi Swapp Dreamy and Dear Lizzy Neapolitan Editions) and that’s it! On the front side I stuck on some Target sticky notes, then on the back I have a few Hema tab sticky notes as well. I made sure to stick the notes over the cards that didn’t have a cute little quote on them. Then the next page is just the first divider that I was originally going to use as my dashboard, but I need laminate for it and I haven’t gone out and purchased any yet. I made all of my dividers out of Dear Lizzy scrapbook paper that I got on sale at Michaels.
My first section houses my personal information page and my monthly and weekly calendar inserts. I just started my planner, so there is very little to show in this section, but here’s basically the gist of it. Opposite my information page is just a bit of inspiration. The paper I used for my dividers were only one-sided, so I took a sheet of the Cute notepaper from Kikki K and finally put my Blinks of Life stamps to use. And since my planner didn’t come with a Today marker, I made one out of a Project Life divider (Honey Edition) that I trimmed down and punched holes to fit. I have two of these markers in my planner, one to mark the current monthly view calendar page and the other to mark where I am in the weekly calendar view.
Here’s a little flip through video I shot just to show you the other dividers that I made. Right now all the sections are arbitrary. I haven’t decided what I want where. I’m hoping to just use this planner at home mostly because it’s so big. I would eventually like to purchase a personal sized planner, maybe a Medium Lilac Kikki K Time Planner, and use that on the go. And if I end up doing that, I won’t really need the weekly calendar inserts, as I’ll primarily use my personal planner for all the day-to-day stuff.
But as of right now, I have a blog section where I keep track of post ideas and statues and the like for my personal blog, ariestrash, and my collaborative blog, colbie magazine. Then I have a personal section where I track my expenses, how many books I’ve read so far this year, and where I’m keeping all of my trip planning. The last section in the back just has all the Kikki K To Do page inserts. I have an extra section that is empty as of right now, but it will be used for my Ashely Goldberg paint.plan.play class I’m taking in November over at Studio Calico.
Anyway, that’s my planner so far. I will no doubt be adding to it as I go along. But I’ll leave you here with a few pretty “outtake” photos of sorts. :)


Laura
kannst du mir vllt verraten welchen Abstand die Ringe bei Kikki K zueinander haben ? Mein Planer kommt nächste Woche und ich würde sooo gern schon Einlagen dazu gestalten :-)
amanda greeson
Where do I buy one of these planners
Tiffany Julia
amanda greesonYou can find this exact planner at http://www.kikki-k.com! :)
Sara
Hi Tiffany, I love this planner! Could you provide the link that would take me to this EXACT planner? When I go to the Kikki k website and think I’ve found the same one, the interior looks more orange where yours looks more pink! Thanks so much
Tiffany Julia
SaraHi Sara! this is the planner. The only difference is the sticker and divider colors, but it’s the same planner. It looks a little peachy on my screen, but it’s the same. I find that Kikki K planners are much prettier in person than what you see on the screen. The lilac time planner is a beaut as well! :)
tammy
hi! Can you please tell me how you got the pretty divider tabs?
tammy
^^^ the tabs that are sticking out to the right, not the project life honey ones. Thanks!
Tiffany Julia
tammyI made these dividers from various Dear Lizzy scrapbook papers. They’re from her older lines, Lucky Charm, 5th and Frolic, Neapolitan, and Polka Dot Party, I believe. Got them from a Best of Dear Lizzy paper pack. :)