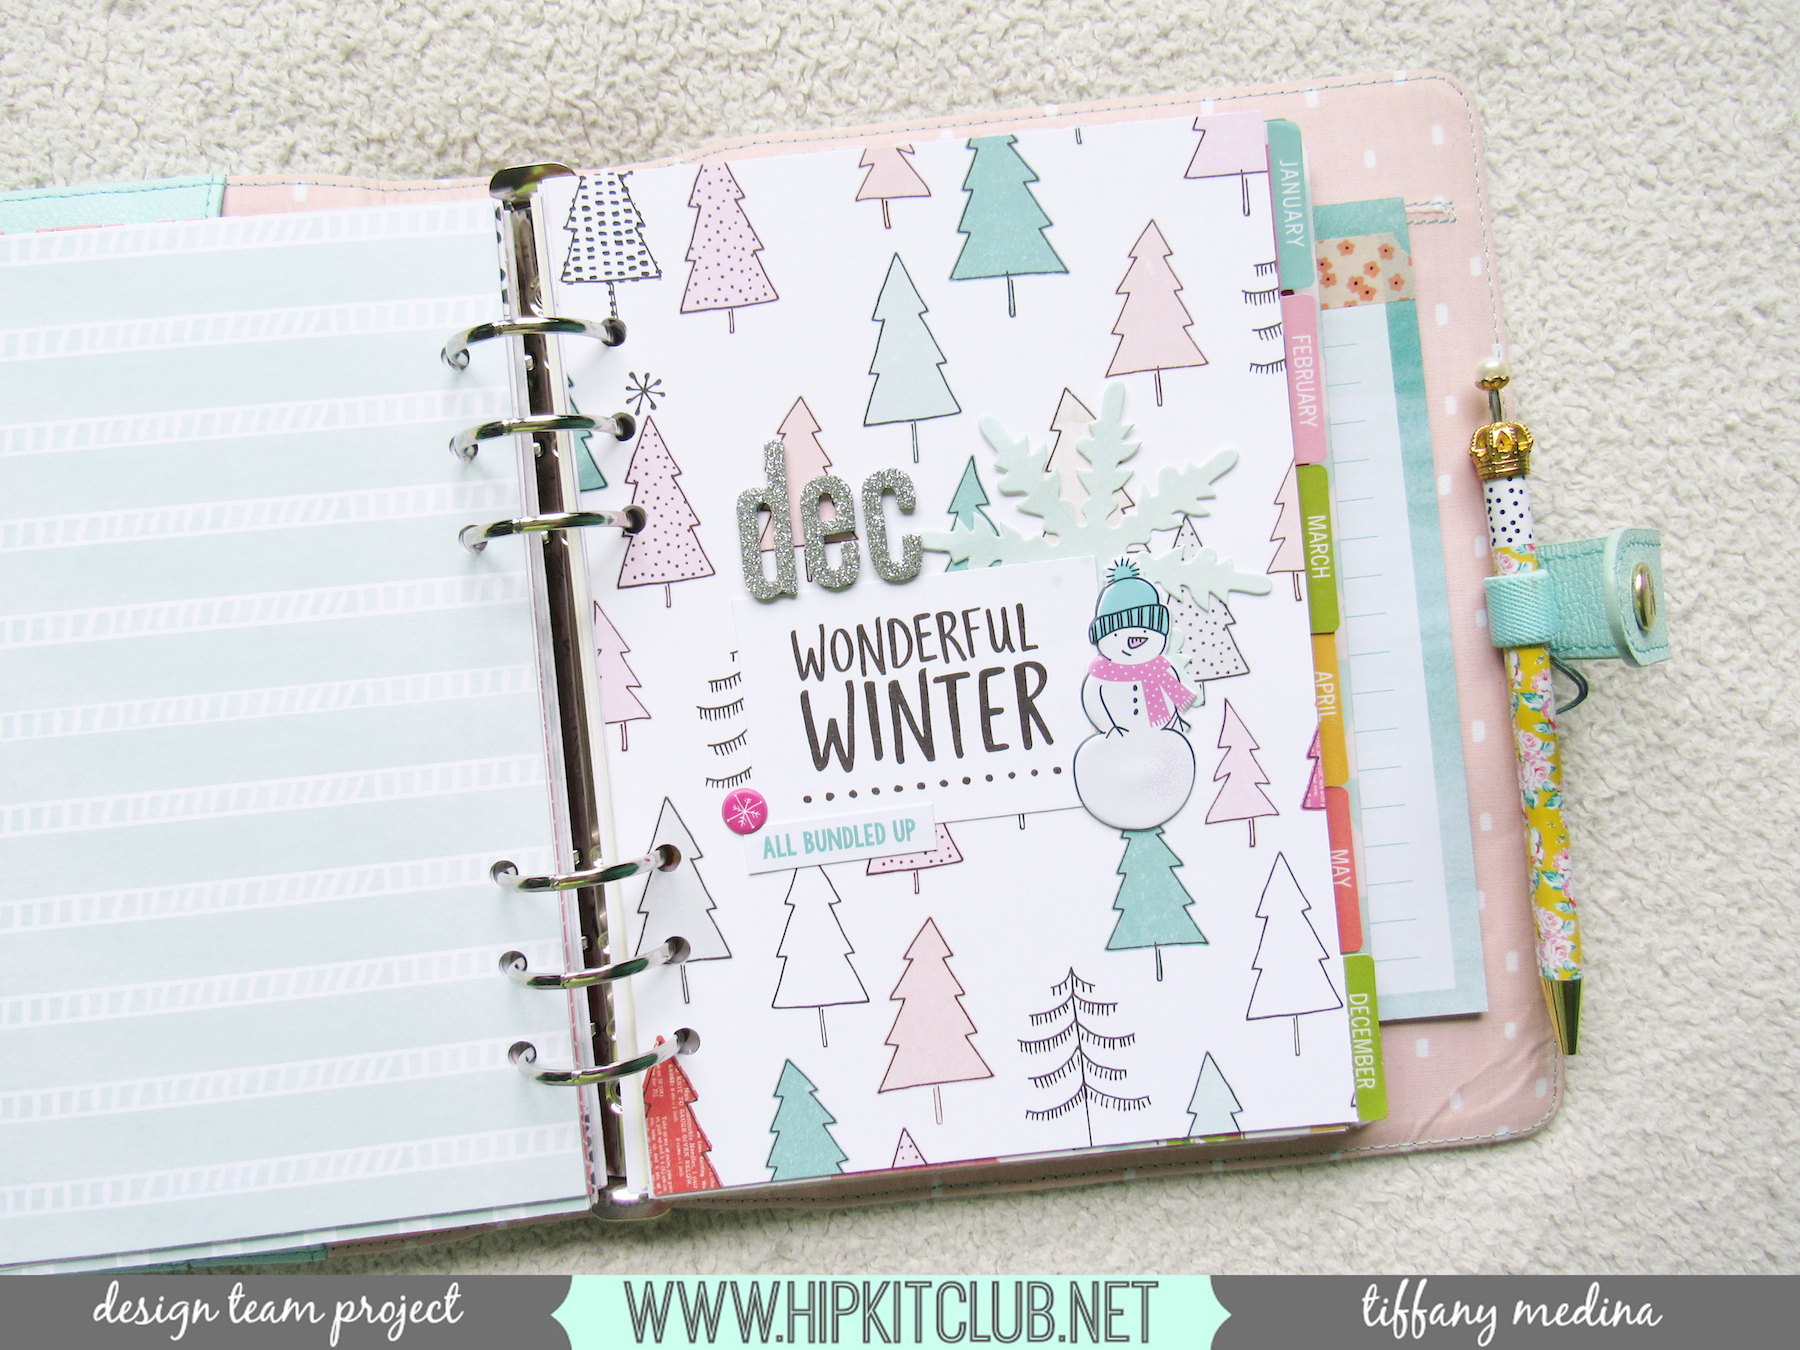
I’m here with a winter planner setup for December using my Hip Kits! I dug into my November kits for this one and oh my am I loving all the colors and cute winter elements! I used a mixture of things from the Main Kit, Embellishment Kit and even my December Documented kit to set up my December pages. I began with covering up my December Carpe Diem divider with that beautiful tree paper from Crate Paper’s Snow & Cocoa line that you can find in the Main kit. I absolutely love all the colors of this kit and pretty much kept to the light mint blues, pinks and white of that tree paper throughout my entire setup.
I worked on the divider first. After covering my divider with that paper, I played around with a few pieces from the Snow & Cocoa cut apart paper also in the Main kit. I ended up using that black and white Winter Wonderland piece as my focal point. I layered it on top of one of those mint snowflake pieces from the Snow & Cocoa ephemera pack and place the snowman puffy sticker from the HKC exclusive sticker sheet on top. I kept this divider really simple because that paper was just so lively. I added one of those phrase stickers from the HKC exclusive sticker sheets from the Embellishment kit and another puffy sticker, this one of a pink snowflake. Lastly, I wrote out “DEC” with the sliver glitter thickers that came in the Embellishment kit.

After working on my divider, I went onto decorate my monthly spread. I pulled out two papers from the Main kit, Rosy Cheeks and Cosy, both from the Snow & Cocoa line. I used Rosy Cheeks to cover the border on the top of each insert and Cosy to cover up the sidebar. Since all of the thickers that came in these kits were far too thick for my liking–I didn’t want to bulk up my planner using them–I decided to used the exclusive flat puffy alpha stickers from the October Hip Kits to write out “December” on the top. The pink color is a bit more on the warm side compared to the pinks of the November kits, but it wasn’t too warm that it didn’t match. It actually matches quite good and I tried using the sides of the papers that had a bit of that peachy pink color on it, so that it balanced the alphas out.
I then went to work embellishing the corner of my monthly spread with a few banners that I cut out of the Snow & Cocoa cut apart sheet. The paper is called Hot Cocoa and it’s from the Main kit. I used the black and white banner with the triangles and snowflakes on it and layered the yellow snowflake banner on top of it. I also made my own horizontal banner from the branding strip of the Cosy paper, layering one of those word phrase stickers on top of it.
Next, I numbered my spread. I used some Simple Stories alphas from my stash and only numbered the days in which I have something due. After I had everything numbered, I began embellishing. I used that tree strip from the Hot Cocoa cut apart sheet to cover up the boxes on the top leading up to the first of December. I had to trim it down to size, but I love how it turned out! I then cut up a bunch of square pieces from the three papers I’ve used on this project to fill some of the calendar boxes. I scattered them about the page, making sure to balance out each pattern. On the bottom right, I placed a piece from the Snow & Cocoa ephemera pack and embellished with a few puffy star stickers from the Pinkfresh Studio Oh Joy! puffy sticker sheet from the December Documented kit. I embellished the boxes I covered with paper with bits from the HKC exclusive die cuts and puffy stickers as well.
Be sure to check out my process video below to get a better look at how my December pages came together!

I also made two really cute bookmarks using the kits for my planner. One is a Today page marker and the other is a corner bookmark that you can use in your planners, but also in notebooks or a book you’re currently reading. I used papers from the Main Kit and embellishments from the Main, Embellishment and December Documented kits. Most is from the Crate Paper Snow & Cocoa line.
The first is a “Today” page marker. I chose a paper that I liked and trimmed it down to fit into my A5 planner. You can trim a strip to fit any size planner or notebook of your choosing though. Once I had the bookmark shaped piece that I wanted, I went ahead and laminated it and then trimmed the excess lamination around the paper. I then embellished it with pieces from the kits. I used the silver glitter thickers from the Embellishment kit to write out the word TODAY on the top. I used two sets of letters for the front and back, as I was very fortunate that the word TODAY is perfectly symmetrical. After I placed and glued down my embellishments, I punched my holes and cut slits into them and slipped my page marker into my planner!
For the second marker, I did a bit of simple origami. I cut a strip of my chosen paper and folded it into a triangle shape, trimming off the excess. I then traced the shape onto a piece of the same pattern paper and cut out that triangle, which I then glued to the back of the folded triangle. This created a little triangle hat, so that you can tuck it over a page corner. I then went ahead and embellished it.

These are really simple projects to add something cute into your planners. Be sure to watch the process video below to get the step by step of how I made these!
Products used: Hip Kit Club November 2016 Main Kit, November 2016 Embellishment Kit Add-on + November 2016 December Documented Kit


